Sunday, November 10, 2013

Why is that grown man riding a trike?

Introduction

Trike.


Not a word that makes you think of sportiness, speed, agility, and comfort.  Also not a word you typically associate with adults.  But oddly enough, trikes are becoming more and more popular, as an alternative to the other self-propelled methods of transportation.  But why?  Why would someone want to ride something that strange, rather than a more traditional bike?

A little background.  I was a competitive cyclist many years ago.  I raced road bikes and mountain bikes, I dabbled in cyclocross, I commuted 30 kms to university year round, and I was even a part of various bike trials competitions and demonstrations (for those of you who aren't familiar with bike trials, think of it as stunt riding), so I am experienced in a wide variety of cycling disciplines.

A few months back, I started riding a recumbent tadpole trike.  I have been using it as my primary commuter to work, I used it to ride a century (100+ kms), and I've now even had a good opportunity to test it out in both snow and ice.  These are my opinions on the pros and cons of tadpole trikes when compared to a more traditional two wheeled bike.


Speed

People often get caught up in the "weight weenie" mindset, where everything needs to get lighter for them to get faster.  But here's the thing about weight: weight matters when climbing a hill or accelerating.  But as soon as you are up to cruising speed, weight no longer matters.
The amount of energy required to climb a hill (Joules) is equal to the weight multiplied by the distance climbed in meters squared, divided by the time in seconds squared.  So the heavier the bike, the more effort required to climb a hill.

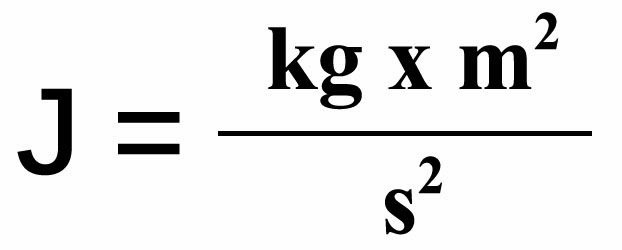
With acceleration, the same principle is true.  But in this case, let's use the formula:
The force required to accelerate is equal to the total mass of the object multiplied by the acceleration.  So to keep acceleration the same, more force is required as the mass of the object increases.

So yes, considering that the average XC mountain bike is ~24 pounds, the average road bike is ~19 pounds, and the average trike is ~36 pounds, there is no question a traditional bike can out accelerate and out climb a trike.  So if this is important to you, trikes are definitely not the best choice.

However, once you are up to speed, weight no longer matters.  What matters now is rolling resistance and aerodynamics.  Rolling resistance is highly dependant on the tires so there isn't a very easy comparison between the different styles of bikes.  The theory is that, because there is an extra wheel on a trike, there is probably about 50% additional rolling resistance, but in reality, there isn't any noticeable difference.


Aerodynamics

Aerodynamics is a completely different story.  Up to this point, it seems like a traditional bike wins hands down.  But this is where the game changes.  Completely.

I remember when the Trek Y-Foil 77 came out in the late 90s.  They claimed that the frame was 37% more aerodynamic than a traditional frame.  This was impressive, of course, that isn't the whole story.  The aerodynamics of the frame really have very little to do with the maintainable speed of the bike.  I remember looking at it at a bike store the last year it was produced, and having a debate with a salesman about how much the aerodynamics of the frame matters.  He was convinced that the 37% aerodynamics boost was for the frame and rider combined, not just the frame, alone, in a wind tunnel.

What is the point of this story?  If you look at a very thin and flat profile of a road bike, and compare it to a trike, the road bike looks way faster.  But as soon as you put a rider on each one, things change...

  1. A rider sitting on top of a road bike is high off the ground.  In fact, the taller the rider, the bigger the bike, and the higher they are off the ground.  With a trike, however, you are sitting inches off the ground.  Just like comparing a tall truck with a lowered exotic sports car, the closer you get to the ground, the more slippery you will be in the wind.
  2. A rider sitting on top of a road bike is curved forward and is acting like a human parachute.  Even in the most aerodynamic position, with the rider's back flat, they are still catching the wind.  But with a trike, you are reclined.  Yes, you are not sitting flat (on most trikes, anyway), but because you are reclined, the wind easily goes up and over your shoulders instead of cupping the wind and slowing you down.


But how much of a difference does this make, really?  Well, this is the elevation change on my typical commute from work:


As you can see, it starts with a quick decent, an extended flat section, and then a climb back out of the river valley.  Net elevation is pretty flat, but there is a little short of 100 meters of overall climbing.

I wanted compare how fast I could do the ride on my road bike compared to the trike.  Before I did the ride, I actually thought the road bike would be faster, since I would be able to climb quicker, making up a lot of time at the end.  But this actually didn't happen.

Here is a direct comparison between the two rides (the trike is on the left, the road bike is on the right):


As you can see, even with the big climb and weighing nearly double, the trike was about 13% faster than the road bike!  Over a short distance, where fatigue doesn't come into play, that is pretty impressive.  As you get more tired, fatigue starts to show a lot quicker on a traditional bike than on a more comfortable recumbent, so this percentage will likely only increase.


Agility

The agility advantages and drawbacks are subjective.  On one hand, the trike handles like a go-cart and descends hills like a bob sled, which is incredibly fun!  It's low centre of gravity and three wheels also gives you a lot of traction for taking corners at speed.  But the style of cornering is slightly different.  With a road bike, the situation (road conditions, speed, pedaling, etc.) will dictate how much you lean your bike through the corner, and how much you just lean your body.  But with a trike, you can't lean the trike itself.  Instead, you need to lean your body hard into the corner, similar to how you would corner a snowmobile.  Otherwise, you will roll.  This happens surprisingly easily.  So even though all three wheels are (hopefully) always planted on the ground, it is important to lean your body to keep it that way.  That being said, once you are comfortable with the trike, they are extremely fast around corners.  Arguably, faster than a traditional bike.  But this takes practice.


 Comfort

A traditional bike leads to a lot of comfort problems.  The most obvious is related to saddle sores, but beyond the problems related to the uncomfortable seat of a traditional bike, there is also the back problems that come out of being bent over all the time, neck problems that come out of holding your head out and up all the time, and the arm and hand problems that come from supporting the weight of your torso.

When you sit on a recumbent trike, all of these problems disappear!  Your back is supported, your arms don't support your weight, and your neck isn't pushed out holding your head in an awkward position.  It is just like you are sitting in a reclined camping chair.  Very comfortable!

Something else to consider on long rides is that, when you get tired on a traditional bike, your head gets heavy and you start looking down.  All you see is the line on the road.  But with a trike, your head stays up.  You see everything!


Safety

It is becoming more and more dangerous to ride bikes on the road.  In fact, it is unfortunately very common for a bike to be run off the road by an immature driver.  With a trike being so much lower to the ground, the initial though is that they would be even more dangerous because drivers are less likely to see them.

Oddly enough, the opposite is true.  Because cyclists are so common on the roads, no one takes notice of them.  They are just another biker to run off the road.  But since trikes are so rare, the same driver that would create a danger for the cyclist spends more time trying to figure out what they are looking at, and by the time the time they figure it out, they have already passed you.  It is because they are so rare, that they are also safer on the road than other types of bikes.


Winter Riding

It seems most winter commuters these days are using studded tires.  I have used them as well, but personally, I'm not a fan.  My first year commuting through the winter, I used studded tires on both the front and back.  My second year, I only used one on the front (for braking and cornering).  And by my third year, I didn't bother with either.  If you plan to go out and race around a frozen lake, then studded tires are great, but there are downsides.

  1. Studded tires are heavy, and being rotational weight, it is in the worst possible place to add weight.
  2. Although they improve traction on ice, studded tires are slippery on pavement.
  3. Studded tires have horrible rolling resistance.  It makes pedalling a lot harder.
  4. They make a very annoying noise.

With a trike though, you aren't going to fall over, and because there are two front wheels, you already have double the cornering and braking power.  So really, even without studded tires, you are still a lot safer than on a two wheeled counterpart.  But that isn't even the best part!

Riding a trike on ice means you can do something awesome ... drift.  Since you are likely going to taking corners much faster on ice than a two wheeler, you can also throw your back end out easily as well, making corners on a trike extremely fun!  Drifting ... oh the drifting...  Commuting doesn't get much more fun than that!

There is a downside, though.  When riding on bumpy rutted snow or ice, which is common on trails popular with runners, the smaller wheels on a trike will not roll as easily, making it harder to pedal on those trails.


Transporting the Bike

Fitting most trikes into a car is going to take some planning.  It isn't as easy as pulling the quick release wheels off, and dropping it in the trunk of a car.  Most trikes don't fold, so you may be forced to pull all three wheels off (usually not a quick release) and pulling the boom out (also usually not a quick release).  You might possibly even be forced to remove the seat.  So basically, you are disassembling the bike with tools every time you want to fit it in the back of a car.  Even if you do have a foldable trike, they don't collapse to anywhere near the footprint of a traditional bike.  Oh, and they definitely aren't going to fit on a traditional bike rack either.  Something to consider when deciding if a trike is something that will conveniently fit into your lifestyle.


Conclusion

Needless to say, trikes are not for everyone.  But the fact is, even people who don't see themselves ever owning one may change their minds very quickly after just one test ride.  They are fast, safe, and a lot of fun.  If you've ever thought about something a little bit different, take one for a test ride.  You won't be disappointed!

Sunday, July 14, 2013

Tips for Concert Photography

Kent Sangster.  Please visit his site at www.kentsangster.com

Introduction

Concerts are among the most difficult situations a photographer will find themselves in.  There are constant changes in light.  And we're not talking a about just light intensity, we're talking about the color of light as well.  Not only do the different light sources (LED, halogen, fluorescent, etc.) cause different color casts, but quite often stages will deliberately throw different colors on the stage for lighting effects.  Plus, the light we do get is dark, inconsistent, and the performers are always moving, making it near impossible to keep a fast enough shutter speed to get a sharp image.  So how can we get good concert shots?


Tip 1 - Shoot in Manual Mode

It is a mode that is feared by many.  But it is almost a necessity while shooting concerts.  When the camera is metering for a scene, it will average out exposure across everything on stage, including the black background, the bright lights, the reflections off of instruments, the visual effects that are going on around the performers....  Most of the time, the camera's metering works fairly well, or at least well enough.  But when you are dealing with the constantly changing lighting conditions, the camera will get confused.  Ever picture will have a different exposure, even though all that matters is the performers themselves.  Chances are, if all that is lit on stage is the performer, and the background is black, then the camera will try to over-expose the performer's face.  If you simply try to compensate by using "exposure compensation" then you may get a few good shots, but changing your angle or changes in light during the performance will mess up your settings again.

The only way to prevent slight changes of lighting in the scene from changing your exposure is by using manual mode.  This way, you make the decisions, not the camera.  Once you get the exposure dialed in, you can shoot all night!  Just occasionally check your LCD screen and histogram to make sure your exposure hasn't changed, and adjust accordingly.


Tip 2 - Arrive Early and Meter!

Arriving early is a no-brainer.  But it is what you spend that time doing before the concert that matters.

Try to meet with the lighting technician when you arrive.  Ask him what special effects are planned for the concert, and see if you can get him to dim the house lights and set the stage lights to what he expects to set them to during the concert.  Then, if you have an incident light meter, get on stage and take a reading.  Otherwise, ask a stage hand to stand on stage and take a few test shots to figure out what your exposure will need to be set at as a starting point.  This will make let you start getting great shots right from the start, instead of wasting the first several shots trying to get a good exposure.


Tip 3 - Shoot Raw!

Shooting RAW (as opposed to JPEG) gives you a lot more of a chance to salvage a poorly exposed shot.  So if you need to pull a stop of exposure out of the picture in post, you can!  Plus, white balance is something you don't even have to worry about, since you have 100% control of white balance in post with a RAW file, unlike JPEG where you can only perform minor adjustments.  JPEGs throw away the majority of data before it even reaches your memory card, so what you capture when you press the shutter button is pretty much what you are stuck with.


Tip 4 - Use Silent Shutter Mode

Many of the DSLRs available today have a "Silent Shutter" mode.  Effectively, what this does is slow down the speed of the mirror.  Instead of slamming the mirror up as fast as possible, releasing the shutter, and then slamming the mirror back down (which does make a loud noise), the slower moving mirror makes the entire action much quieter.  The downside however, is there is more shutter lag (takes longer between pressing the shutter button and capturing the picture) and you have a much slower rapid-fire (the 5D Mark 3 goes from 6 frames/second to 3 frames/second in silent mode).

Depending on the concert and venue, this may not matter.  For example, with a rock or hip hop concert where there are a lot of screaming fans, or in a bar, it probably doesn't matter as much.  But in a concert where things can get quiet, or in a venue that has world class accoustics, the sounds of a mirror flapping around can be very distracting and annoying for the audience.


Tip 5 - How Fast Can Your Shutter Go?

This is where your technical skill comes in.  As discussed previously, lighting is going to be a challenge.  It will be hard to get enough light to properly expose.  But at the same time, everyone is moving around on stage and you need to keep a fast shutter speed.  How can you do this?

This is very dependant on your camera (high ISO performance), your lens (aperture), and your skill (capturing sharp images with a slow shutter on a moving subject).  Ideally, you want as fast of a shutter speed as your gear can handle, so that the moving performers will be sharp.  Yes, this is difficult, but this is where having a high technical knowledge and skill comes in handy!  Know the exposure triangle, and know your gear.  After that, practice makes perfect!


Tip 6 - How Slow Can Your Shutter Go?

Contrary to Tip 5, capturing percussionists while dragging your shutter can lead to very interesting effects.  In most cases, you want to freeze motion.  However with drums, a fast moving drum stick can give a completely different feel to the picture.


So when shooting a drum kit, give dragging the shutter a try.


Tip 7 - Focus Stacking

Chances are, when you are shooting in dark environments, you will be forced to use very wide aperture, probably around f/2.8.  Of course, when shooting that wide, you will have a hard time getting more than one person in focus, since the focus plain will be so narrow.  A way to combat this to quickly focus on multiple people and capture them each in focus, and then stack the pictures in post.  It takes a lot of practice to be able to get multiple pictures that can be stacked, while changing your focal point, all while things are changing in the scene, but if you can get this to work out (even once!) then it will make a big difference in the shot.


Tip 8 - Shoot Everyone

Depending on the size of the band you are shooting, try to get at least a few good pictures of everyone on stage.  Everyone on stage is as important as the next, and each of those performers may come back looking for a picture of themselves performing.  You never know what exposure may come up from having a shot of them in your portfolio!


Conclusion

If anyone gets the opportunity to shoot a concert, they should jump on it.  It is one of the best ways to challenge your skills.  If you can pull off a concert, you will likely do well in most any situation.

Saturday, July 6, 2013

What's in my bag?

Introduction

It seems customary for bloggers to, eventually, make a post about their gear.  What do they use, when do they use it, and why they chose it over other gear. Well I figured I would do the same, and possibly do a follow up in a year or two to see how things have changed.

Now before I get started, here is the standard disclaimer:  I must make it clear that it is not the gear, but the photographer that makes the difference.  It has been said that 99% of the gear out there is better than 99% of photographers, so unless you are in the top 1% (and even if you are) you don't need the best.  This is simply what I have chosen to use.


Body

My current camera of choice is the Canon 5D Mark 3.  In my opinion, this is the best body available today.  Sure the Canon 1Dx costs $2000 more and has more sheer brain power, and the Nikon D800 has almost twice as many pixels on the sensor, but in terms of the features that actually matter (to me) the quality of the image, and the ergonomics of it, it is the perfect body.  Its 61 focus points (vs. 9 on the Rebels and 11 on the 6D), dual card slots, and exceptional dynamic range make it ideal for everything I use it for.  And of course, the full 35mm sensor gives endless silky smooth bokeh.

What is it missing?

There are a few things that I miss.  The 6 frames/sec in burst mode, although still pretty quick, isn't as fast as the 8 fps I got on my old 7D.  And it is nowhere near the 14 frames/sec on the 1DX.  Having the extra speed is very helpful when shooting sports, otherwise it really doesn't matter.

I also wish it the exposure metering wasn't always based on the center of the frame.  The 1DX can meter based on the focus point, even if the focus point is near a corner.

And the third thing I wish it had was an Ethernet jack.  Ethernet reaches a lot farther than USB does, and is much faster and reliable than transferring wirelessly when shooting tethered.


Zoom Lenses

Zoom lenses are great for when you don't know what you're walking into.  Although you sacrifice a bit on quality, you gain a great deal in convenience, allowing you to change the focal length at the blink of an eye.

Canon 8-15mm f/4L Fisheye - A very unique lens.  This is both a circular fisheye (at 8mm) providing a full 180 degrees field of view, and a linear full frame fisheye (at 15mm).  It is two lenses in one!  This is great for artistic shots, but can easily be overused.  This one needs to be use sparingly and carefully, but if used right, it can give an eye catching effect.

Canon 24-105mm f/4L - This is my walk-around lens.  It is my slowest lens, not giving a very nice depth of field and often requiring a flash to use indoors, but for walking around a party and quickly going from a wide angle lens to a medium telephoto lens, and everything in between, is a great convenience.  Plus, being an L-series lens, it is weather resistant, which is a big advantage for shooting on a beach or on a not so sunny day.

Canon 70-200mm f/2.8L IS II  - The ultimate sports photographers lens.  Excellent quality, excellent bokeh, lightening fast focusing, great in low light.  If you shoot sports, you need this lens.  It is also a great lens for portraits (if you have enough room, you'll be standing a long ways away from your model) and family shoots when standing back and letting the kids take a break and just be silly.


Prime Lenses

Most of what I shoot is done with prime lenses.  You don't have the luxury of being able to simply twist the lens and crop in on your subject, but when doing portraits, you do have the luxury of being able to quickly zoom with your feet.  WALK up to your subject.  The prime lenses are typically much faster, considerably fewer imperfections, and a higher quality light capture device.

Canon 35mm f/1.4L - Given that my current studio doesn't have a lot of depth to the room, this is my favourite lens for portrait work.  Plus, it could be one of Canon's best build quality lenses!  It is wide, but it has corrective elements to prevent the deformation you get with most wide angle lenses.  The image quality produced by this lens is about as good as it gets, and the bokeh is silky smooth.

Canon 50mm f/1.4 - This is my least favourite lens that I currently own, and is also the only non-L lens (other than the Lensbaby) that I own.  The "nifty fifty" is a lens everyone should own, since the image it captures is exactly the same perspective as what we see in real life.  But, for the same reason, it gives a very boring shot.  You have to work harder with this lens to make the picture interesting than you do with other focal length lenses.  So even though it is a lens that is almost a requirement to own, I rarely ever use it.

Canon 100mm f/2.8L IS - Obviously, this is what I use for macro photography, and for that it is excellent.  However, I also use it, along with my 35mm, for close-up portrait work and head-shots.  It is incredibly sharp (almost too sharp, but there is always softening in post), and the bokeh is beautiful.  This is the most versatile lens I carry.

Lensbaby Composer - This is a cheap selective focus lens, intended for getting artistic shots.  Everything about it is manual.  The aperture is adjusted by putting in different sized aperture disks using magnets, and the focus is completely manual as well.  Given the price, this lens is a great way to learn techniques, but in practice, you can get the same result (possibly better) using Photoshop in post, using a much sharper lens.  Like the other 50mm, this lens rarely makes it into my bag.


Lens Modifiers

Although having a relatively extensive collection of lenses covers a wide range of  uses, there are times when I want to extend the intended use without having to carry around (or pay for) additional lenses.

Canon 2x Extender III - This lens multiplier will turn the 70-200 f/2.8 into a 140-400mm f/5.6.  Great for wildlife, and sports from far away (especially outdoors, since it looses 2 stops of light, making it much slower).  I will also use it on my macro lens to increase the macro magnification.  If you are interested in how this works, please see a previous blog post about increasing magnification on a macro lens.

Promaster Extension Tubes - Extension tubes are nothing more than spacers to hold the lens farther away from the camera.  This changes the working distance between the camera and the subject, allowing a closer minimum focusing distance.  If you are interested in how this works, please see a previous blog post about increasing magnification on a macro lens.


Lens Filters

If the lighting conditions don't let you get the results you are looking for, then filters help modify the light for a better overall result.

Circular Polarizer - Great for landscape shots.  They really get the sky to pop!

ND8 Neutral Density Filter - Neutral density filters are like sunglasses for your lens!  If you need to cut out the light, which allows you to either use a wider aperture, or a slower shutter speed, an ND filter will let you do that.  The ND8 filter cuts out 3 stops of light.

10 Stop Neutral Density Filter - This filter serves the same purpose as the ND8, but is black.  Instead of just cutting 3 stops of light, it cuts out 10 stops (lets in 1/1024 of the original light).  It is designed for taking pictures of the inside of ovens, but I will use it to get a 10 minute exposure in bright sunlight, or I will stack it with the ND8 to get 13 stops of light filtration (lets in 1/8192 of the original light) to photograph the solar eclipses.


Flashes

Natural light is beautiful and flattering when used properly, but there are times when you need an extra kiss of light.

Canon 580EX II - This is my main flash.  It is powerful, full featured, will act as both a master and slave, supports high speed sync, and has a built in reflector card.

2 x Canon 320EX - These flashes are much smaller than the big 580EX powerhouse, and will only work as slaves, but still support wireless ETTL.  I occasionally use these flashes for low powered fill flash or hair light, or for light experimentation.

Canon ST-E2 Speedlite Transmitter - This device has the same master flash functionality as the 580EX flashes, except that it isn't an actual flash.  It allows for off-camera flash triggering, and fully supports ETTL and multiple flash groups, but doesn't throw any light on the subject.

2 x Elinchrom 400 Watt Strobes - These are my main studio strobes.  Perfect for portraiture in a small studio.


Light Modifiers

Flash and strobe light can be harsh.  Even when using natural light, you may have the need to modify it in some way.

2 x 24" Elinchrom Softboxes - These are the perfect size softboxes for my small studio.  Since they are always very close to the subject, the light is diffused enough to provide beauty light, without requiring a whole lot of power to light the scene.

30" Convertible Umbrella - Whether using this to reflect or shoot-through, this umbrella will easily light my entire studio with a single flash, for those times when this is what I'm going for.

38" Lastolite Silver/White Reflector - Reflectors are a huge part of lighting.  They can be used to capture available light and reflect it back into the subject's face to fill in the shadowy areas like the eye sockets, under the chin, or below the nose.  They can also be used for reducing the harshness of daylight, and as a last resort, you can throw them on the ground and let your subject sit or lay on them to stay off the wet grass.  Super light, super compact, and extra useful.

106" Projector Screen - My studio doubles as a movie theatre.  When in studio mode, the projector screen on the side wall makes an excellent reflector.  Also, the theatre has great audio for playing music during the shoot ... you know, to set the mood.


Tripods

Tripods are vital for any long exposure work, and even to rest your arms when using a heavy lens.

Manfrotto 055CXPRO3 & Manfrotto 498CR2 Ballhead - This is my workhorse tripod.  Very tall, very sturdy, great vibration reduction, and excellent configuration options. Being carbon, it is light enough to carry around, but the design does not sacrifice strength.  It get tall enough that I need to stand on a chair, and will even go flat enough that it will hold the camera right against the ground.  Excellent configuration.

Benro C-069 R8 Travel Angel Carbon Tripod & B-00 Ballhead - One of the lightest tripods I have ever picked up.  Separated into 5 sections, and weighting as much as a feather, this tripod will easily slide into a bag and be forgotten about.  Strong enough for a light lens and moderate length shutters, it is great for hiking down a long trail to a waterfall shoot, or taking on trips to Hawaii where you are already pushing the limit of your luggage weight restrictions.


Other Accessories that go in the bag

Other notable items I carry around ...

Canon GP-E2 GPS Receiver - This device serves three purposes.  1) It tags the GPS location and compass direction in the metadata of each picture.  2) It records your walking path during the shoot.  3) It synchronizes the clock in the camera using an atomic clock, ensuring that the capture time for the pictures are accurate.  When doing on-location shoots, this is a great tool to have, because not only is each picture that is being delivered to the client tagged with the exact location the picture was taken, I can also give them a map of where we walked to in the park.  This gives an extra element of value to the package that is being delivered.  However, for obvious security reasons, I never use the device while at or near home, and I always strip out the GPS details before posting images on-line.

Eye-Fi Pro X2 - This card is a nifty device that lets me immediately transfer JPEGs that were captured on my camera to my phone, where I can instantly text, email, or upload to any social networking site.  Just a note: Eye-Fi recently released a new version of the card called Mobi, claiming that it is the first to allow direct-to-phone transfers.  Although it is easier to set up, this is all the Mobi can do.  The older X2 can do this, plus a lot more.  The only advantage the Mobi has is ease-of-use, otherwise it is very limited relative to the older version.

Canon RC-1 Wireless Shutter Release - Just a basic wireless remote for hands-off shutter release triggering.

2 x LED Flash Lights - Used for light painting at night.  Open the shutter, paint in the scene with the flash lights, close the shutter.  Lots of interesting effects to be had here.

Blanket, wet wipes, clothes, water, etc - When on a family shoot in the park, you never know what you will run into that you want to have the subject sit on, or if the kids get their hands dirty, or a runny nose ... it is always good to be prepared!


Camera Bags

Depending on the event, I have two camera bags I will use.

Think Tank Streetwalker Pro - This is the perfect size for a pro camera and the lenses and accessories I typically take with me on a photo walk.  It is big, but not too big.  Tripod mount on the outside, a rain cover that tucks away, and is very well built.

Lowepro Computrekker Plus AW - When I was looking for a camera/laptop bag, I had a problem.  They were all designed for 15" screens or smaller.  My laptops are always 17" screens and very thick.  My current laptop is an ASUS G75V with dual hard drives, 16GB of RAM, i7 processor, dedicated nVidia graphics card, and a huge cooling system.  The laptop is not small, so I needed something big.  This bag is huge.  Not only does it hold everything you'll ever need for your camera, but it also has a laptop compartment that fits my massive laptop.  And, it is designed to still be used as carry-on luggage!


Conclusion

That's about it!  Other than a few small items that aren't worth mentioning, these are the items that are either in my bag, or are a big part of my studio.

Please remember to like me on Facebook, and follow me on Google+!

Sunday, June 16, 2013

Why do cameras still have view finders?


Introduction

With virtually all digital cameras now having an LCD screen on the back, allowing us to see a much bigger and often more accurate idea of what is going to be captured when the picture is ultimately captured, why then do so many cameras still have a viewfinder?

This is a question I often hear asked.  Do we really need that tiny window in the back of the camera?  The answer is actually very simple, but not really that obvious.  Let me explain.


The Causes of Blurry Images

There are two things that will make your pictures look blurry.  The first is the one we all know, and that is simply if the lens was not properly focused on the subject.  But there is another reason.  Motion blur.

Motion blur, also, can be caused by two things.  One is if the subject is moving when you take the picture.  This can be mitigated by using a faster shutter speed, but this isn't always possible.  The other cause of motion blur is if the camera moves during the exposure.  It is very important to keep the camera as still as possible while taking the picture to make sure you aren't contributing to motion blur.


Steadying the Camera

Do this:  Hold your arms wait out in front of you and try to keep them steady.  It's hard!  It doesn't matter how steady you are, your arms will still be moving slighting.  Plus, if you hold them out for awhile, your arms will begin to get sore, making it even harder to hold them steady.  So what happens if you try to hold a camera steady for long periods when you are holding it out in front of you?  The same thing ... it will be very difficult to hold it steady.

Now, try pulling your arms in close to your body and hold them steady.  Much easier!  If you hold your camera in close to your body, you are essentially turning yourself into a tripod.  Your pictures will be in general, noticeably sharper. Plus, your arms won't get as sore over time.

This is exactly what the viewfinder does for you.  It let's you get your camera in as close as you can, and hold the camera as steady as possible!


Conclusion

By using the viewfinder, your pictures will be sharper, and you will be able to get more pictures throughout the day!

If you found this helpful, like me on Facebook!

Saturday, June 1, 2013

Printing Your Art


It has been said that pictures hasn't been realized until it is put into print.  In today's age, it is so easy to shoot the pictures, share them with friends and family online, but most pictures never actually make it to print.  But really, even a 4x6 sitting in a photo album isn't doing your art justice, how many times do you actually pull out that album and look at it?  Or show your friends?  Chances are, not very often.  Your best work should be hanging on your walls, framed on your coffee tables, not lost on your hard drive or in a closed photo album.  The problem is, how should you go about printing them?


The truth about why photographers hold printing rights...

Usually when you hire a photographer to capture an event like a wedding, or a studio session, their contract states that you must order all prints through them.  There is a lot of negativity about this.  I've heard things like "this is just a way for them to scam us out of money."  Of course, the residual income is something any business person would like to capture, but that's not the whole story.  In fact, this isn't even the main issue.

The main issue is simply this: if they control the printing rights, the customer is assured of getting high quality prints!  A good photographer takes pride in their work, and doesn't want to see their pictures get printed without an appropriate level of quality.  There is a huge difference in a print from a low quality (an inexpensive) printer like Walmart, compared to a dedicated printer that has very expensive and well calibrated printers and quality assurance processes.

The contrast and detail that you can lose from budget printers is astounding when you see two identical prints from two providers side-by-side, making it clear why they are so cheap.  A photographer doesn't want to have their art work cheaped out on when printing, because:
1) the customer will not be as happy with it, and
2) their friends and family who see those pictures will not be impressed with the quality and assume it is a flaw with the photographer, leading to a potential loss of business.

It's like buying blu-ray movies and watching them on the old cathode ray tube television in your parent's basement.  If you've spent hundreds of dollars on a professional photographer, don't cheap out on the prints!


What to consider when printing...

We are getting to the point where it almost doesn't make sense to have your own printer.  Ink is very expensive, and the ink dries out fast, meaning if you don't use the printer, the ink is just drying up, making the actual cost per sheet sky-rocket if you aren't using it daily.  Outsourcing your print jobs, for most people anyway, often makes sense, so you need to consider if the convenience of being able to do it yourself outweighs the typical loss of cost and quality.

If you are printing out small pictures, up to 5x7, then a budget place like Walmart, Costco, or London Drugs is usually good enough.  Any bigger than that, and chances are you plan to use the picture for something special, so paying a little extra for quality becomes something worth very strongly considering.

Please note that I won't be recommending any quality printers, because this depends on your printing purpose and desired format, and the best places change over time.


Printing formats...

1. Metal
I recently had my first metal prints done.  I'm not talking about the metallic photo paper made by Kodak, I'm talking about prints done on a piece of aluminium.  The first time you see a print on metal, it is like nothing you've seen.  It's kind of like seeing HD TV for the first time.  There are several different ways to do metal prints each having their own best uses (i.e. glossy for nature, satin for portraits, sheer for high key, etc.) so it is important to do your research for best results.

2. Canvas
Another popular format for fine art prints is canvas.  These are prints done on a muslin canvas (the material, not the religion) and stretched onto a wood block frame.  These prints, even more than with metal, work much better when they are printed very large, otherwise you lose a lot of detail.  But they give you a lot of flexibility on sizes and framing options, and stand out on your wall as a gallery ready print.

3. Books
The digital age has made it extremely easy to create your own custom book and have it professionally printed.  You can use pre-set templates, or design your own layout.  This is a great way to put an entire event into one book, with a more customized look than a standard album.

4. Speciality items
We've all see the customized coffee mugs, mouse pads, and place mats.  The options here are as extensive as your imagination, pretty much everything you could want is available in one way or another.  Again, quality here goes a long way, so depending on what your gift is for, you may want to consider paying a little extra for something that will look good last you a long time.

With all of these options, including just large prints on "old fashioned photo paper," you will want to make sure you do your research and know what you are getting for your money.  You may even want to talk to your photographer to make sure you really are getting the best deal.  In fact, your photographer my even know how to get you discounts!

Just remember this: cheaper is not always a sacrificing worth taking. You truly do get what you pay for.

If you have any questions about any of this, feel free to contact me.  And remember to like me on Facebook!

Friday, April 26, 2013

Manual Exposure Challenge!

Spring has sprung!  The birds are chirping, the snow is melting, it's time to dust off that camera gear that has been sitting in your closet, and start getting it ready for the BBQ season and those family days by the lake!

To help us all brush up on our skills, I'd like to propose a challenge!  One of the best ways to improve your skills is to learn how to use your camera in anything other than its automatic mode or any of the auto subsets.


Let's take a look at the image above, which was taken of a Canon Rebel.  The green box indicates that you are letting the camera choose everything for you.  All of the modes below this setting are simply subsets of auto, for example "portrait" or "action."  All these subsets do is tell the camera that it can still choose everything for you, but it will lean towards a certain shutter speed or aperture setting.  Even P (Program mode) and A-DEP (Auto Depth of Field) gives exposure control to the camera.

As a serious photographer, out of all of these settings, there are only three modes that we should care about.  They are Shutter Priority (Tv on Canon, S on Nikon), Aperture Priority (Av on Canon, A on Nikon), and Manual (M).

CHALLENGE!  Everyone reading this should take their camera out, put it in Manual mode, and challenge themselves to get as many perfectly exposed pictures as they can in 1 hour.  Don't cheat by using auto ISO, either!

By the end of this article, you should have enough tips to at least get you started on shooting entirely in manual mode.  You may just surprise yourself at how easy it can be.


Elements of Exposure

Before I continue, let me step back and briefly cover a very important topic.  In photography, there are three elements of exposure.

1. Shutter Speed is the length of time the shutter stays open.  The longer the shutter stays open, the more light is allowed to reach the camera's sensor.  Typically, with action shots we want a fast shutter speed to freeze motion.  But there are also times when we want to slow down the shutter to add a bit of motion blur, for example with waterfalls.

2. Aperture is how wide the opening of the lens is during the exposure.  The wider the opening, the more light is allowed to enter.  Aperture is what controls the "depth of field" in your shot.  That is, how much will be in focus.  The wider the opening, the narrower your depth of field will be.  This is measured by the f value on the lens.  The smaller the f-value, the wider the opening on the lens.  The bigger the f-value, the smaller the opening on the lens.  This may seem backwards at first, but the way it is measured is simple:

f-value = (focal length of the lens) / (diameter of the opening)

For example, if you have a 100mm lens, and the opening of the lens is 25mm, you will be at f/4.  However, if you zoom in to 200mm and keep the opening the same size, you will now be at f/8.

3. ISO or previously referred to as ASA, is the sensitivity of your film or sensor to light.  It will take more light at a low ISO to properly expose an image than it will at a higher ISO.  However, higher ISOs are more prone to noise (or grain if you are using film).


All three of these values mix together to get a specific exposure value.  Any time we want to adjust one of these elements, we need to compensate by adjusting one of the others.  For example, let's say we know that we are getting the correct exposure with the following settings:
Shutter speed: 1/100 sec
Aperture: f/5.6
ISO: 400

Now let's say that we want to increase our shutter speed to 1/200 sec, but we don't want to change the exposure.  In this case, we must compensate by also adjusting one (or both) of the other two settings.  One example, would be to simply double the ISO.  Since we are letting in half as much light by the shutter speed staying open half the time, we can make the sensor twice as sensitive to the light it is getting.  So one solution would be as follows:

Shutter speed: 1/200 sec
Aperture: f/5.6
ISO: 800

These two settings will result in exactly the same exposure value, except with a faster shutter speed.  Since this isn't a lesson on exposure (exposure is a huge topic on it's own) let's move on...


Sunny 16 Rule

For someone starting out learning to shoot in manual, this is the greatest tip you will ever hear.  When you are outdoors, on a sunny day, if you put your camera at an aperture of f/16, your exposure will be correct if your shutter speed is the inverse of your ISO.  For example...
Shutter speed: 1/100
Aperture: f/16
ISO: 100


Shutter speed: 1/200
Aperture: f/16
ISO: 200

Shutter speed: 1/400
Aperture: f/16
ISO: 400

All of these settings will produce the perfect exposure value for a sunny day.  I said it was easy, right?

Now what if we want to use a different aperture?  Well, this is where math comes in again.  Any change in aperture will require compensation from one of the other values.  But, since this isn't a lesson on calculating exposure, these calculations are out of scope.


What if it isn't sunny?  Are there other rules?

Yes!  We can include the following as well:
  • Snowy/Sandy f/22 rule
  • Overcast f/8 rule
  • "Slightly" Overcast f/11 rule
  • "Heavy" Overcast f/5.6 rule
  • Sunset f/4 rule
For each of these conditions, the same principle applies.  As long as the shutter speed and ISO are inverses of each other, using the aperture defined in the appropriate rule above will get you a pretty good starting point for getting the right exposure.


Conclusion ... and your challenge!

You now have the tools you need to put your camera in manual mode and get some great shots!  So here is your challenge.  Take an hour, put your camera in manual, get outside.  In that hour, try to get at least 20 pictures worth sharing.  I would be happy to see them!

Wednesday, February 27, 2013

How to Isolate and Remove a Green Background in Photoshop


Compositing is a great way to expand possibilities in your photography.  One of the most important techniques in creating a composite is by removing your subject from the background.  Petro Vlahos, the creator of the blue screening (same technique used for green screens), which enabled everything from the delivery of weather forecasts on TV, to dancing penguins in Mary Poppins, died this month at the age of 96. With this in mind, I thought I would share a great technique in how to isolate a high key background (blue or green) so that it can be removed, leaving only your subject standing in front.


Get a High Key Monochrome Backdrop

Green and blue both work well.  Any fabric will do, but typically people will use either seamless paper (a large roll of paper) or a muslin.  The benefit of the seamless paper is that, as the name suggests, there are no wrinkles.  Paper is great for portrait shots, but because the paper can rip easily, it is considered to be disposable.  Muslins on the other hand, are very durable.  They can be easily washed and reused for a long time, making them cheaper long term.  However, they show wrinkles.  Which can be a good thing, or not, depending on the look you are going for.

Personally, I use muslins.  Especially for composites, the wrinkles won't matter, so a muslin will end up being cheaper than seamless paper.  But, painted plywood or bedsheets will work as well, if you can get the right size and color.

I'm not going to discuss the details of setting up and shooting the picture in this article, so let's start from the point where we already have a picture loaded up in Photoshop.


Convert to LAB Color Mode

First thing you want to do, is convert the color mode to LAB.  This is done by going into the "Image" menu, then going to "Mode" and finally select "Lab Color"


What is LAB Color Mode?

By default, the image will be loaded up in RGB mode, or Red Green Blue.  This is essentially how your screen will display the image, all colors are made up by varying the intensity of the red, green, and blue channels.

LAB mode however, works differently.  According to Wikipedia, LAB color mode is "a color opponent space with dimension L for lightness, and an A and B for the color opponent dimensions  based on non-linearly compressed color space coordinates."  If that doesn't make sense, don't worry, it's not really that important.  All we need in this mode is to duplicate the A channel, which depicts the position of the colors between red and green, and we're done here!  So let's continue.


Once you are in LAB color mode, you will see the L/A/B channels in your channels tab.


Since in this case we are working with green, we want to duplicate the A channel (which as mentioned above, is based on the intensity of red vs. green).  To do this, simply drag the A channel down to the "New Channel" icon at the bottom of the window.  You will end up with this...


Now that that is done, we no longer need to be in LAB mode, so we can switch back to RGB mode.
(Image menu -> Mode -> RGB)


Isolating the Green

This is where the magic happens.  Photoshop has a blend mode called "Overlay," which I end up using a lot. What overlay is, is a combination of the "Multiply" blend mode, and the "Screen" blend mode.  Multiply will darken the darker parts of the image, while Screen will lighten the brighter parts of the image.  By combining these two blend modes, we are quickly able to isolate the green on the A channel we duplicated from our LAB color mode.

Step 1: Ensure that the a copy channel is highlighted.  Your image will look something like this:


Step 2: Fill with white, using overlay.  From your edit menu, select Fill.  Then make sure you are filling with white, with a blend mode of Overlay and an opacity of 100%.


You will get an image that looks something like this:


Step3: Fill with black, using an overlay blend mode and 100% opacity.


You will get a result similar to this:


Step 4: Fill with black again.  :)  Same as step 3 above.  Below is a sample result:


Step 5: Fill with white again!  Same as step 2 above.  Below is a sample result:


Note that you must do the fills in this order!  White, black, black, white.  If you do it in a different order, the results will not be as clean.


Step 6: At this point, with the exception of a few blemishes  you will notice that the background is pure black, and the subject is pure white.  You will probably want to zoom in and fix the areas that didn't result in pure white on the subject using the regular methods.  Remember, our goal here is to get pure white on pure black.


Step 7: Hold down Control (Command on the Mac) and click the "a copy" channel.  This will make the channel you just created the active selection.


Step 8: Enable the RGB channel again, and then go back to the layers tab.  Also, make sure the layer is NOT a background layer (if it is, drag the lock on the layer to the trash bin).


Step 9: Apply the layer mask by clicking on the layer mask icon at the lower corner.  The result will be similar to this:


And you're done!  You are now free drop on any background you choose.


Conclusion

With a few simple steps, steps that can even be recorded into a custom action and automated, we can quickly strip out a high key monochrome background, making compositing very easy!

If you've found this article helpful, please visit my Facebook Page!

Monday, January 21, 2013

How to Get Closer Macro Shots Without Breaking the Bank

A charging fly.


Macro Photography.

How else can you walk around a dump and come back with 100 extremely unique pictures worthy of printing?  This is a style of photography that opens the door to an infinite list of possibilities.  The most boring of scenes can be made interesting.  But what if that standard macro lens just doesn't get you quite close enough?  Well, there might be a solution to consider.

Tip of a ball point pen.


What is a macro lens and what is so special about it?

A lot of camera lenses these days have the word "macro" on them somewhere, which doesn't really mean anything at all.  All it is telling the user (or buyer) is how close you can place the lens to a subject, and still be able to focus.  That is, your minimum working distance between the camera's sensor and the subject.  But this doesn't make it a true macro lens.

So what is a macro lens?  Well, it is a lens that let's you focus close enough to the subject so that the image being captured on the sensor is at least life size.  Let me explain...

Take an old roll of film, and hold it against your computer screen in front of you.  If you are shooting with film, or have a full frame sensor in your digital camera, whatever is enclosed inside that 35mm film frame will be the entire picture taken with a 1x macro lens and its minimum focusing distance.  So really, you could take a picture of an old negative with a macro lens, and it will take up the entire frame.

Another way to think of it is, if take a picture of a page in a book with a film camera, have the film developed, and then put the negative from that picture directly on the book where you took the picture, the image on the negative and the original page in the book will be exactly the same size.

Most macro lenses on the market today are 1x life size lenses.  They are probably the most common "specialty" lens you can buy.  However, they can only get so close.  What if you want to take a picture of an ant?  Or a mosquito?  Or a flake of snow?  You could crop the picture down and hope your camera captured enough detail, which is usually okay for posting on the internet, but probably not good enough to print out.

You could buy specialty lenses like Canon's MP-e 65mm 1x-5x lens that will focus up to 5 times life size!  But then you are stuck with a very expensive lens that you will use once or twice, otherwise it will just be making your bag heavier.  So what else can you do?


Extending the 1x Macro Lens

First, let's talk about how a macro lens works.  The reason it can focus so close to a subject is that the element closest to the camera body is suppressed deep within the lens.  The greater the distance between the lens element and the camera's sensor, the closer you can get to your subject.  So, what happens if you make this distance even greater? 


Step 1: Extension Tubes (Spacers for your Lens!)

Extension tubes are simple devices that simply act as spacers between your camera body and the lens.  There is no glass inside, they are just hollow tubes (except for the leads that allow the camera and lens to communicate).  Extension tubes allow any lens (typically over 50mm) to be turned into a macro lens for close up shots.  They sacrifice the ability to focus on things far away, but let you tighten up your working distance.  These are generally available for relatively cheap, and there is nothing stopping you from putting them on what is already a macro lens, thus letting you get even closer than 1x life size!


Step 2: Extenders (AKA Teleconverters)

An extender is effectively a zoom multiplier.  There are two standard sizes for most brands.  A 1.4x extender, and a 2x extender.  The biggest downside to using these devices is that you lose light.  The 1.4x extender will lose 1 stop of light (therefore an f/2.8 lens will become an f/4 lens) and the 2x extender will lose 2 stops of light (an f/2.8 lens will become an f/5.6 lens).  But realistically, for macro shots, you would likely be using an aperture smaller than f/11 or even f/16 in order to control your depth of field, so this really isn't much of a downside at all.  But it will increase the magnification of your lens, getting you even closer to your subject!

Note: Most extenders state that you can't use them with macro lenses due to the position of the elements, but by putting extension tubes between the extender and the lens, this is no longer a problem.


My current setup

So here it is.  My current set-up for extreme close ups:


My current set-up


  • Canon 5D Mk3
  • Canon 2x Extender
  • Promaster extension tubes (come in a set of 12mm + 20mm + 36mm = 68mm)
  • Canon 100mm f/2.8L Macro IS
  • Basic LED ring light (to keep the shutter speed down)

Results?

These are the results.  All of these pictures are un-cropped (just re-sized) taken straight from the full frame camera.

Just the lens at 2:1 (half) life-size

Just the lens at 1.5:1 life-size

Just the lens at 1:1 life-size

Lens + extension tubes at maximum magnification.
Achieves roughly 1.68x magnification.

Lens + extension tubes + 2x extender at maximum magnification.
Achieves roughly 3.38x magnification.


Summary

As you can see, if you already have a 1x macro lens and want to get even closer, you don't have buy a rare and expensive speciality lens to achieve these results.  By simply adding an inexpensive extension tube to your kit, and possibly an extender as well for even more impact, you can increase your maximum magnification by a very noticeable amount.  Although I wasn't able to quite reach the 5x magnification of Canon's MP-e lens, I was able to get similar results for a whole lot less money.